Once you have received IRB approval for your study and you are ready to begin data collection, you must create your experiment in the PIPER system before students can view and sign up for your study.
The following steps are instructions for creating your experiment in PIPER.
- Go to the PIPER website.
- Log into the system using your Unix account name and password (same as email). Only faculty can register experiments, so if you are a student researcher you will need to complete these steps with your faculty sponsor/professor or have them add you as a student administrator.
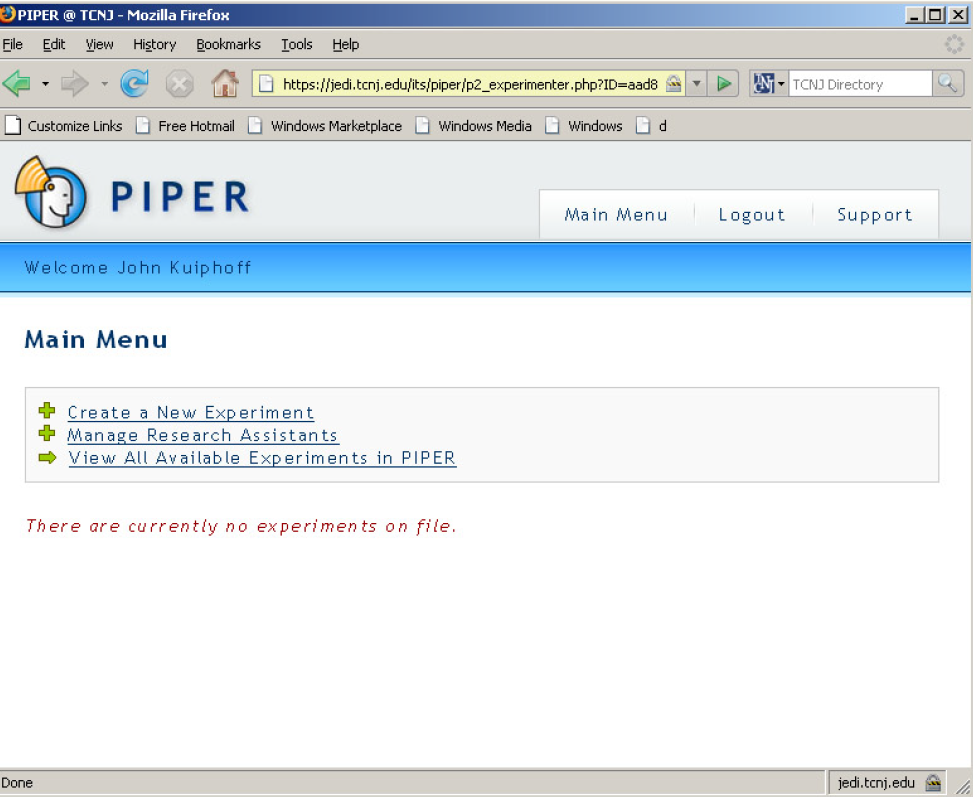
- After you log in you will see the screen below:
- Click on ‘Create a New Experiment’ to continue.
- Click on ‘Create a New Experiment’ to continue.
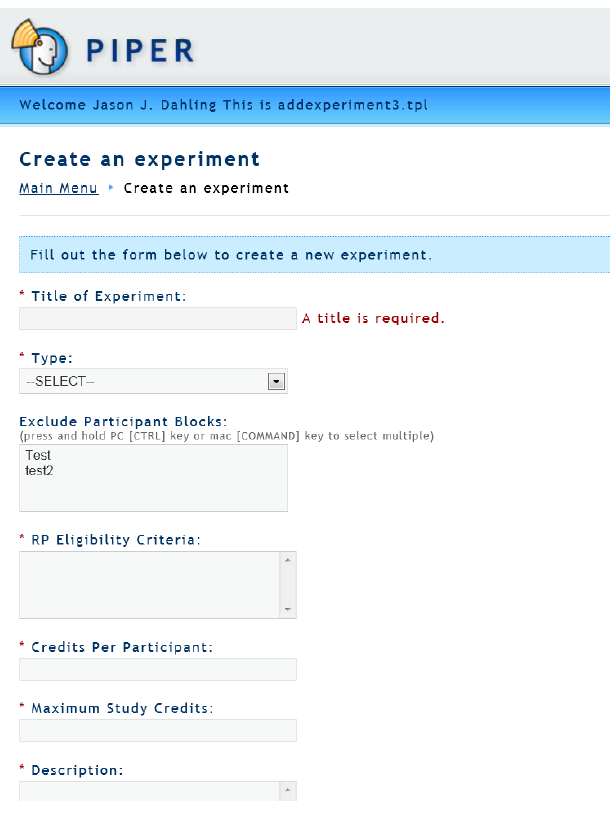
- You will see the screen below:
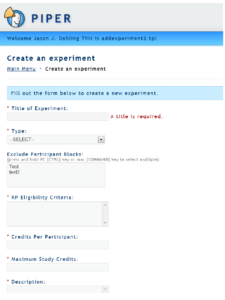
- Enter in your Experiment information:
- Title of Experiment
- Type
- Exclude Participant Blocks: excludes participants who are already signed up for another existing study. Note that you cannot add blocks by editing the study later; blocks can only be applied at the point of study creation.
- Research Participant Eligibility Criteria: any special exclusion criteria is entered here (ex: right-handed individuals only)
- Credits Per Participant: the number of PIPER credits that students will receive (1 credits for each ½ hour of experiment time).
- Maximum Study Credits: The maximum number of PIPER credits that can be awarded to all students in total for this experiment – the pool of available credit for the study.
- Description: Short description that prospective participants can read.
- URL of Supplement Information: Hyperlink to a webpage containing additional information or materials. This is useful for web-based surveys.
- Cancellation Contact: Person participants should contact in the event that they need to cancel.
- Cancellation Phone: Phone number of person to contact.
- Cancellation E-mail: E-mail of person to contact.
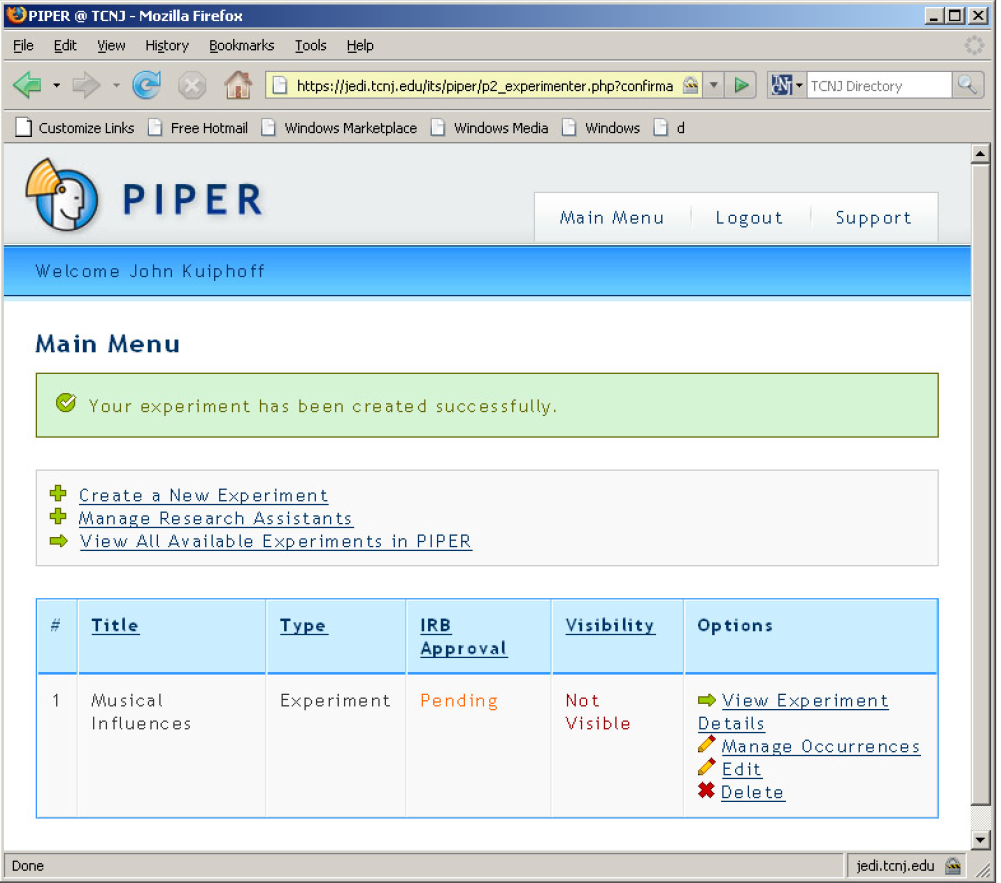
- After you enter your experiment information, click ‘Add’ at the bottom of the page. Your experiment will now appear in your experiment listing.
- Now you must create individual sessions before students are able to signup.
- Click on ‘Manage Occurrences’.
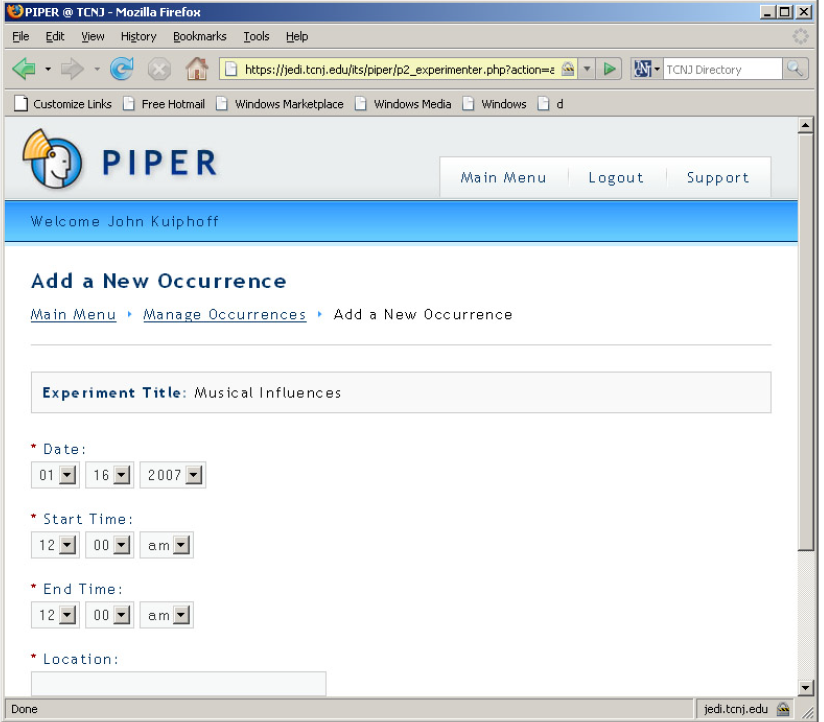
- Click on ‘Add a New Occurrence’.
- Enter in the following information:
- Date: The day that the session will occur.
- Start Time: The time that the session will begin. The length of the session is determined by the number of credits. For example, students will earn 2 PIPER credits if you have a 1 hour experiment. Thus, the length of your session is determined by the number of PIPER credits that you entered when you submitted your experiment information
- End Time: The time that the session will conclude.
- Location: The building and room number where the session will take place.
- Max Students: The maximum number of students allowed to signup for one session. For example, if you collect data from 10 people in one session enter “10”.
- When you are finished, click the ‘Save’ button at the bottom of the screen
- You can create additional sessions by adding a new occurrence. You may also create Linked Sessions if the experiment requires participants to meet more than once.
- Before the experiment is visible to students, the experiment must first be approved by the IRB. The status of this can be seen my viewing your Main Menu. Once it has been approved, you have the option to make this experiment visible to students by click on the ‘Make Visible’ link located on the Main Menu.